
Frame Weaver V1.2.0 brings customizable Frame Profiles to change the relief or shape of the frame by drawing your own cross-section. We also added a Light Elevation slider to move the light closer to the front of the frame, and the ability to load custom texture files. We also added help tips to most of the features and you can now take a guide tour of Frame Weaver on first launch, or any time using the buttons in the About section.
In this post, we're going to concentrate on making a grainy texture image that we can now apply to the frame to give it a brushed or matte metal look, and we also now have a Sheen Amount and Sheen Intensity slider to compliment the global light elevation. Here are the steps to create this in Photoshop.
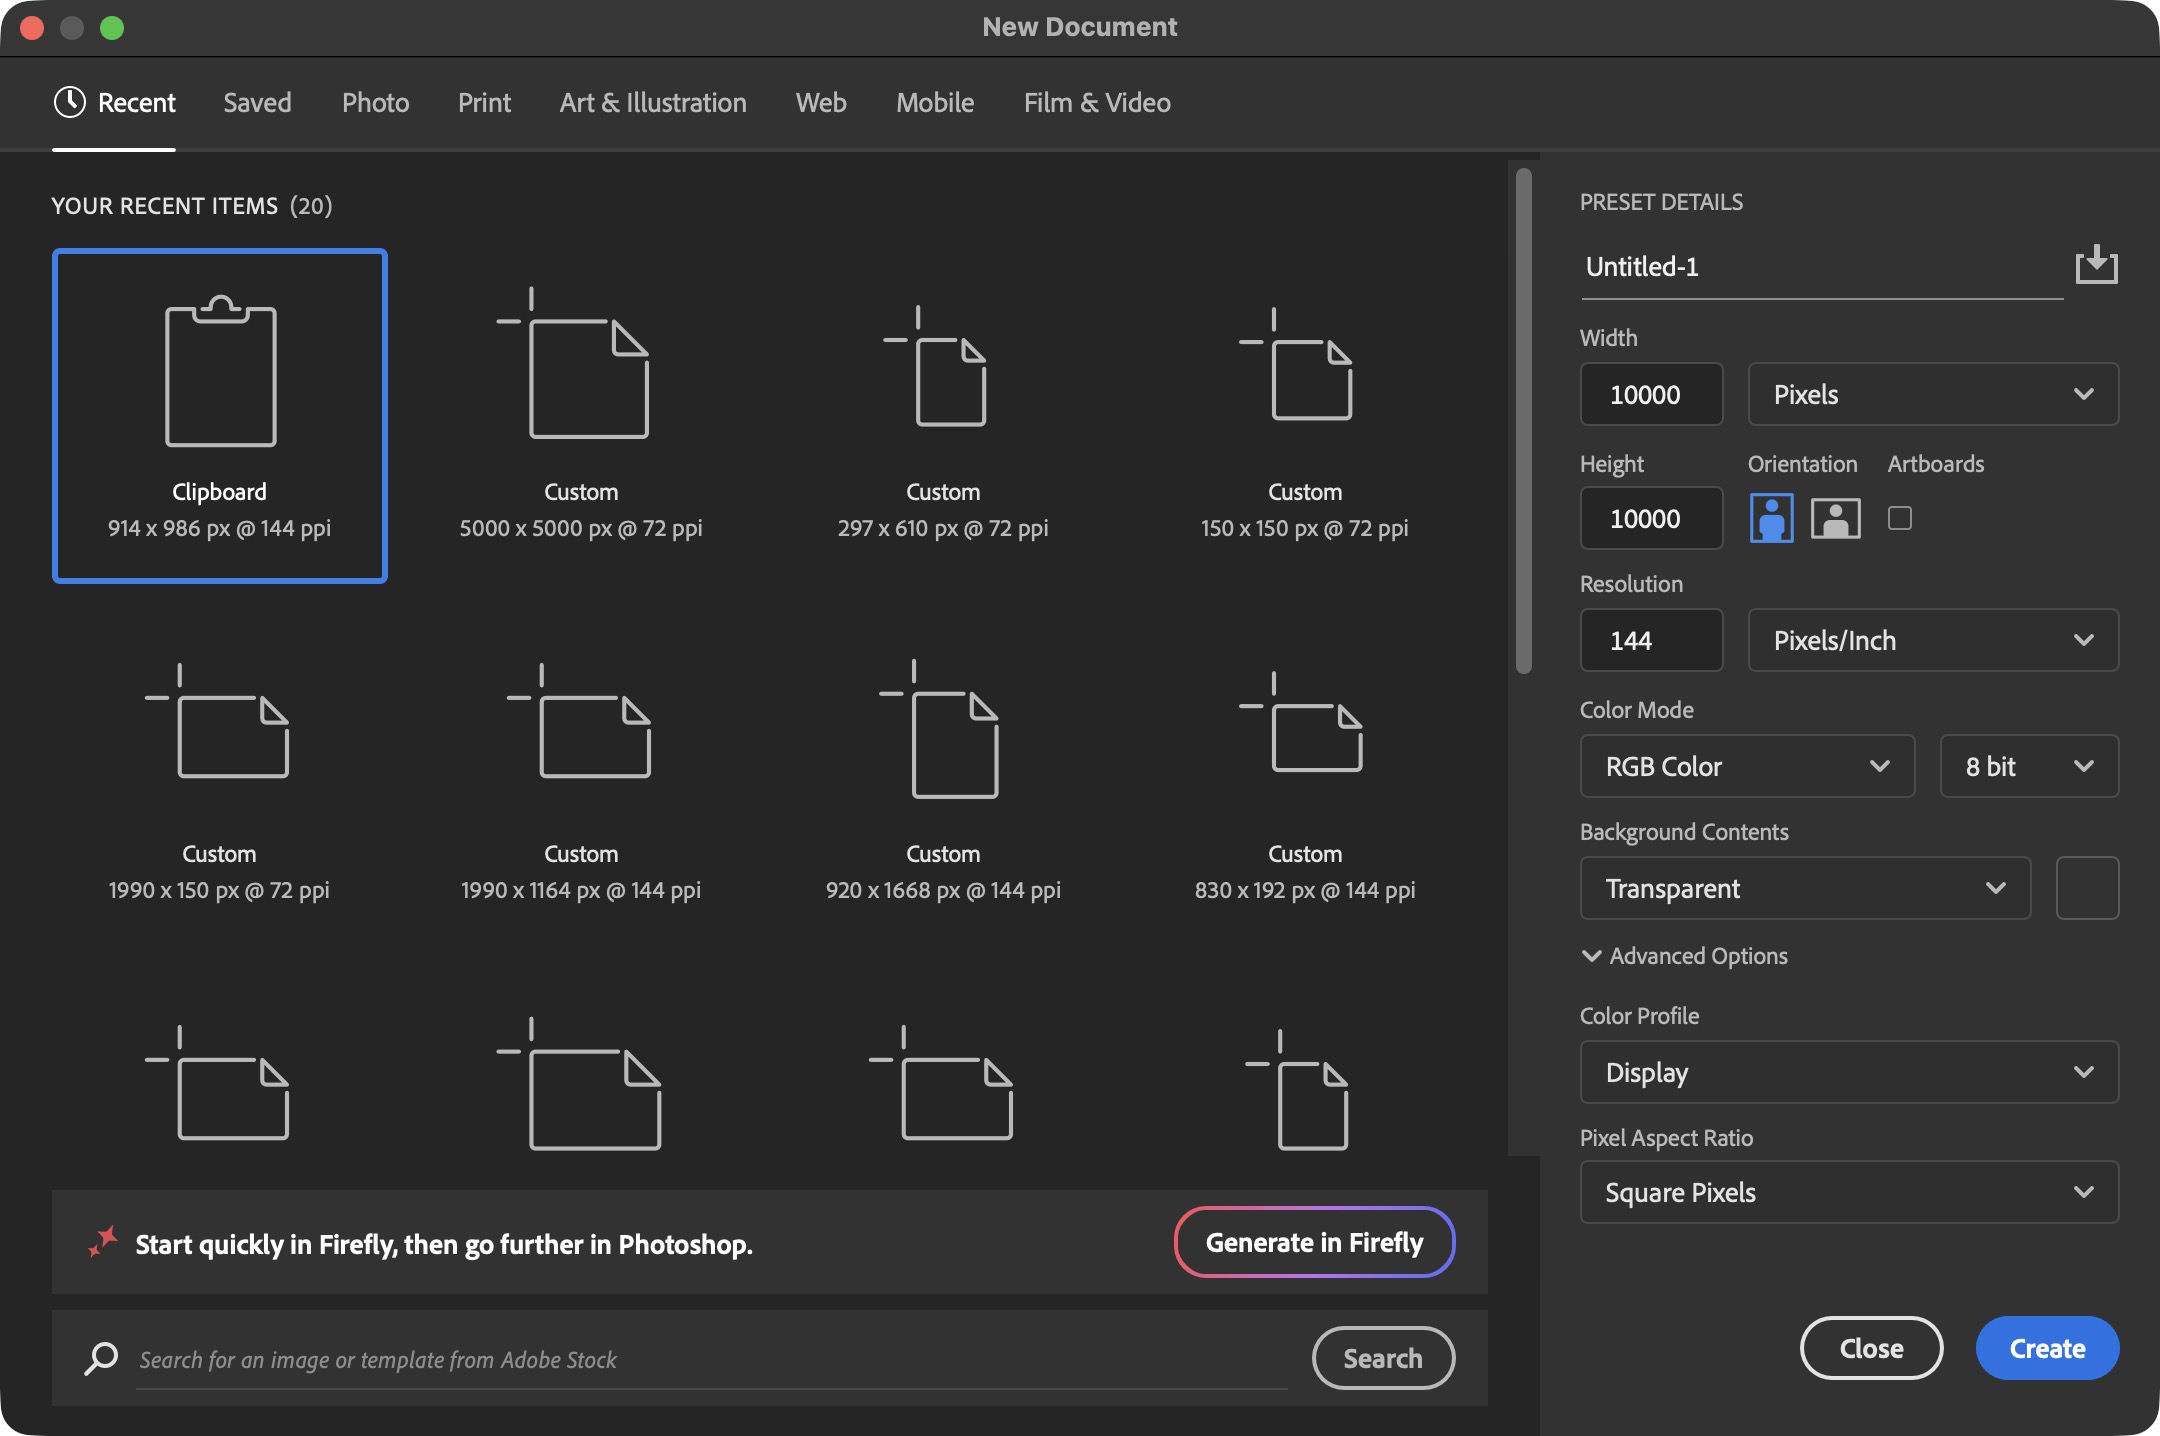
If your frame will only be used for Screen frames, or if you will use it in Frame Weaver on iOS or Android, create a new 8-bit image in Photoshop with the dimensions 8,000 x 8,000 pixels. If you will use the Texture in a Print, select between 10,000 to 12,000 square.
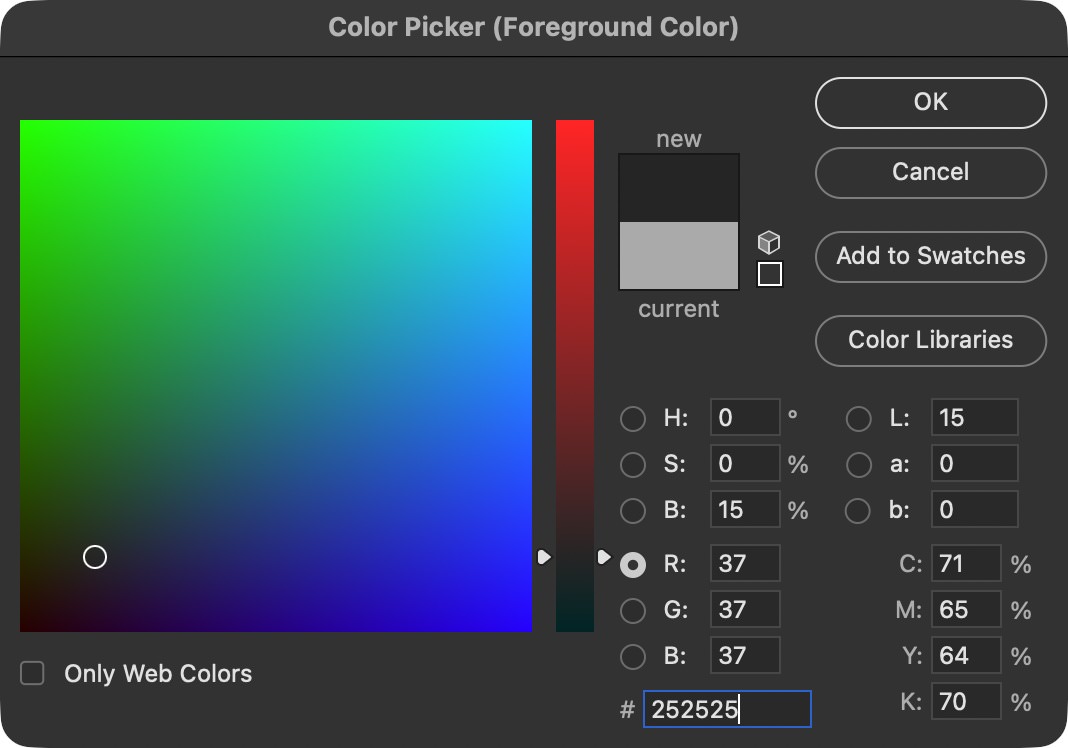
Double click the foreground color in the Photoshop toolbar, and click the # field and enter something like 252525 for a dark gray, which works well for a black brushed metal look. For light matte effects, a lighter gray, like AAAAAA would be better.
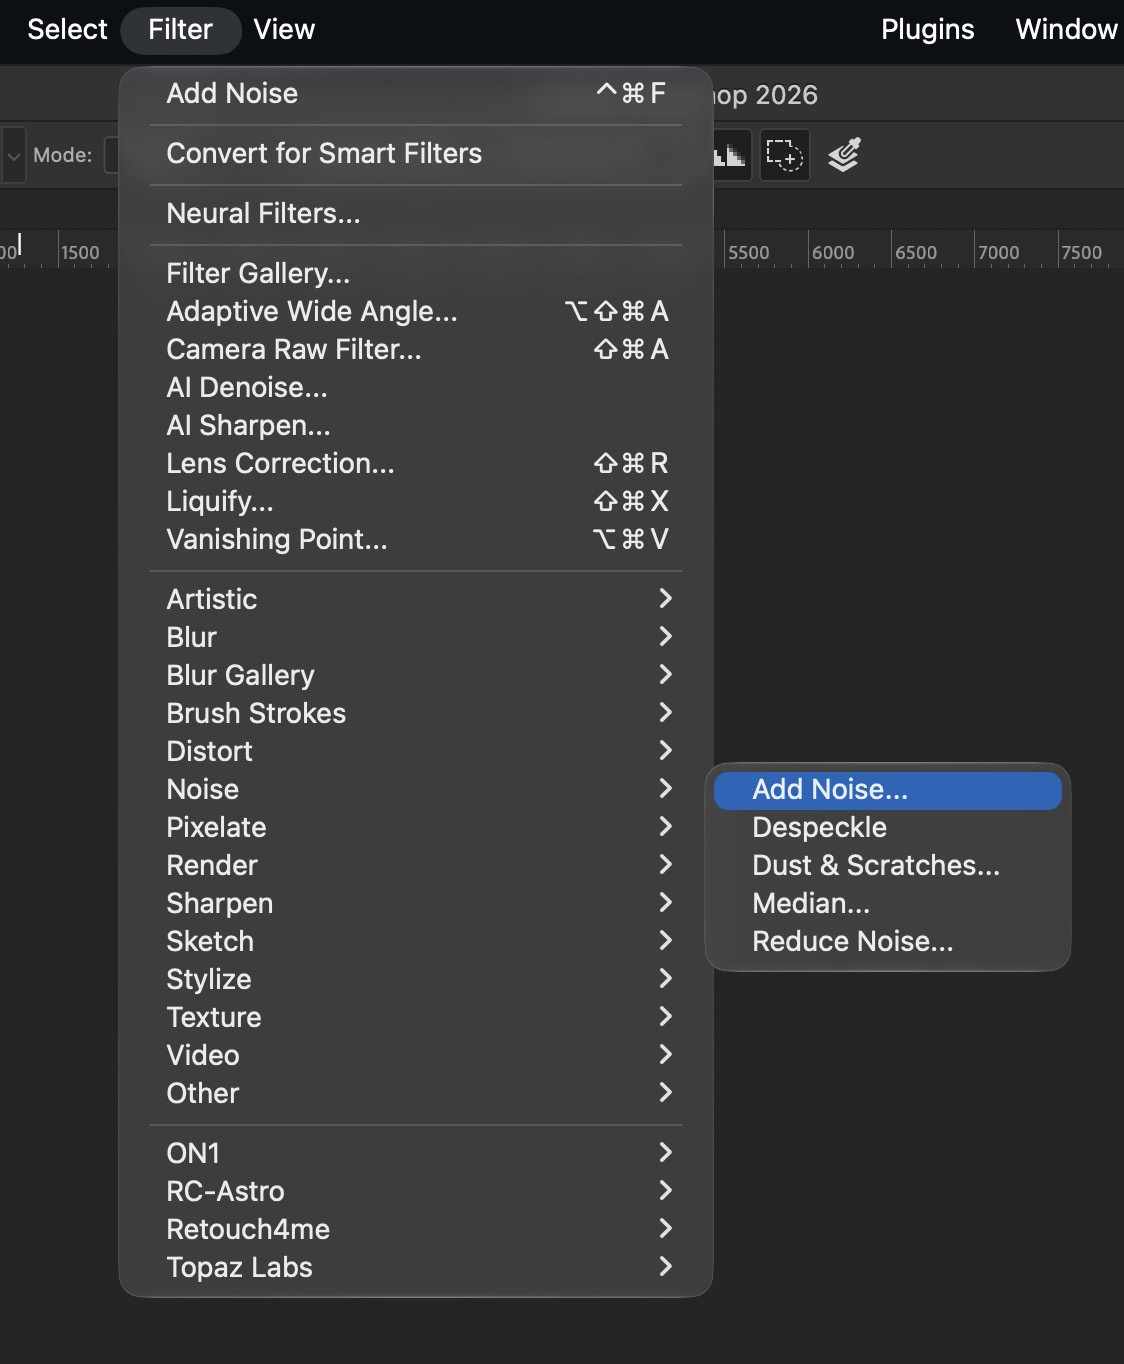
Fill the new image with the new foreground color using the bucket tool, then select Filter > Noise > Add Noise.
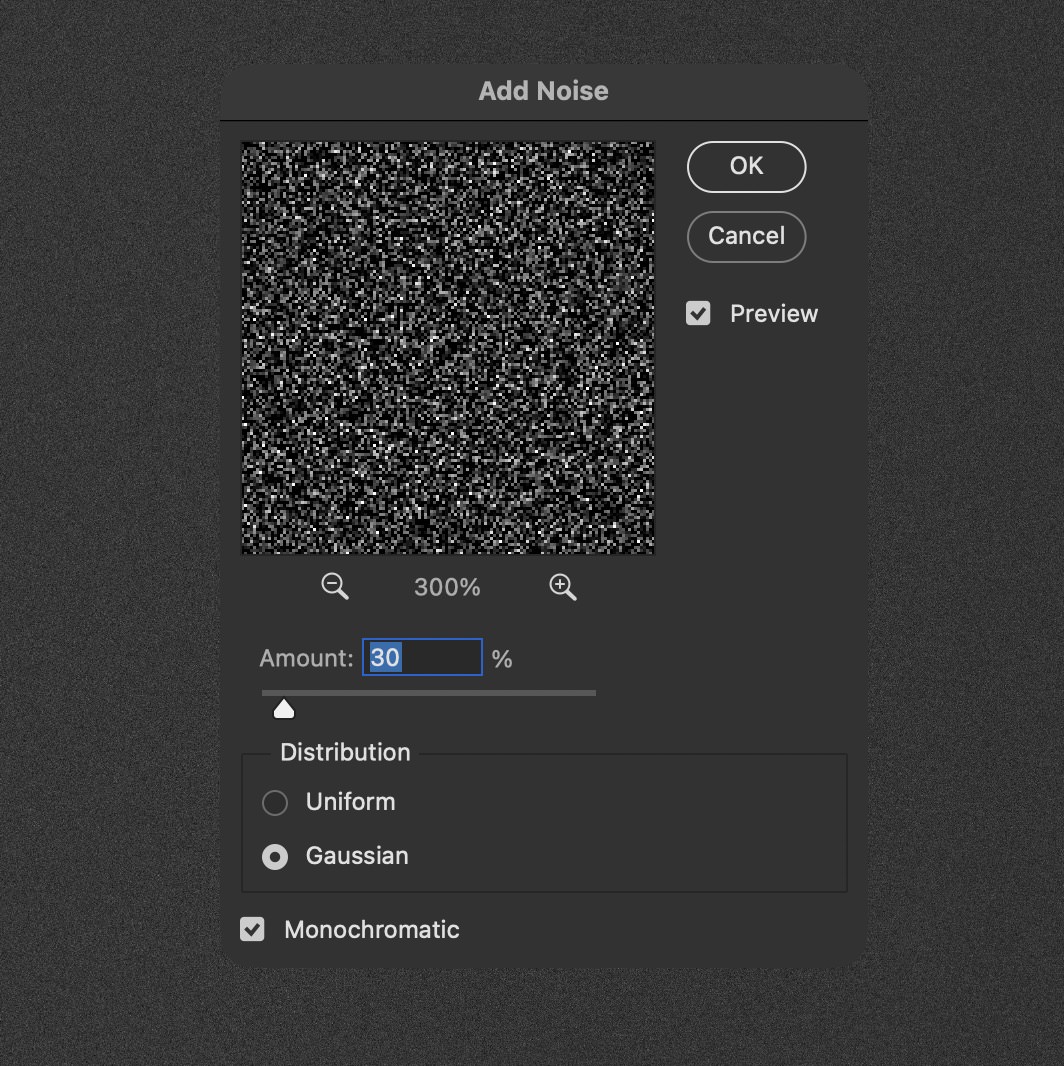
For a versatile texture, I find that selecting between 25 and 30% as the Amount works well, and we can zoom the texture in Frame Weaver too, making the grain stronger, when necessary. For Distribution, I find Gaussian works well, and generally for a texture, we don't need color grain, so select Monochromatic, then click OK.
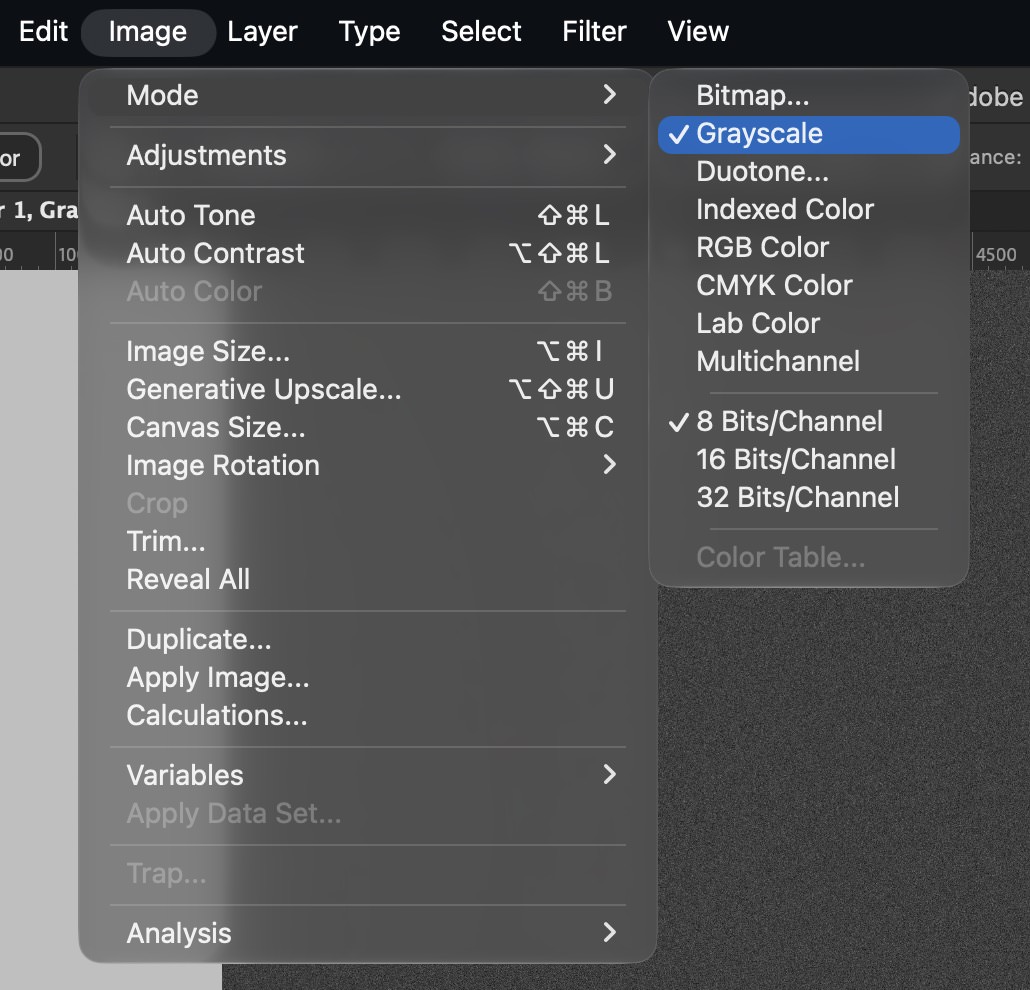
To finish the texture, let's select Image > Mode > Grayscale. Although the image is already monochromatic, selecting Grayscale reduces the file size and may increase performance, especially on iOS or Android. For the same reason, generally for textures, 8 Bits/Channel is fine. Save the new texture with an appropriate name.
Back in Frame Weaver, check the Add Texture box, and click the LOAD TEXTURE button, then locate the new texture file on your disk, and load it. If it is not selected, select your new texture from the TEXTURE pull down. For a fine grain texture like this, it may not be obvious how it affects the frame at first, especially if you are still using the default Flat frame profile.
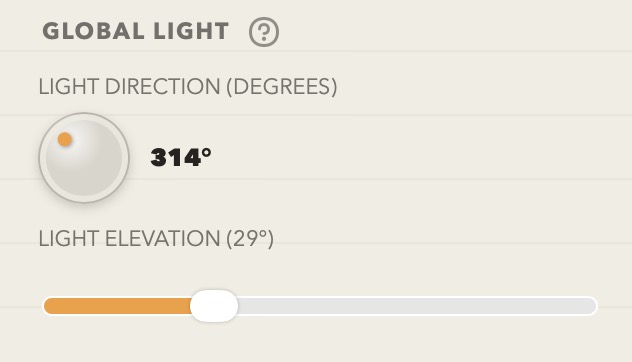
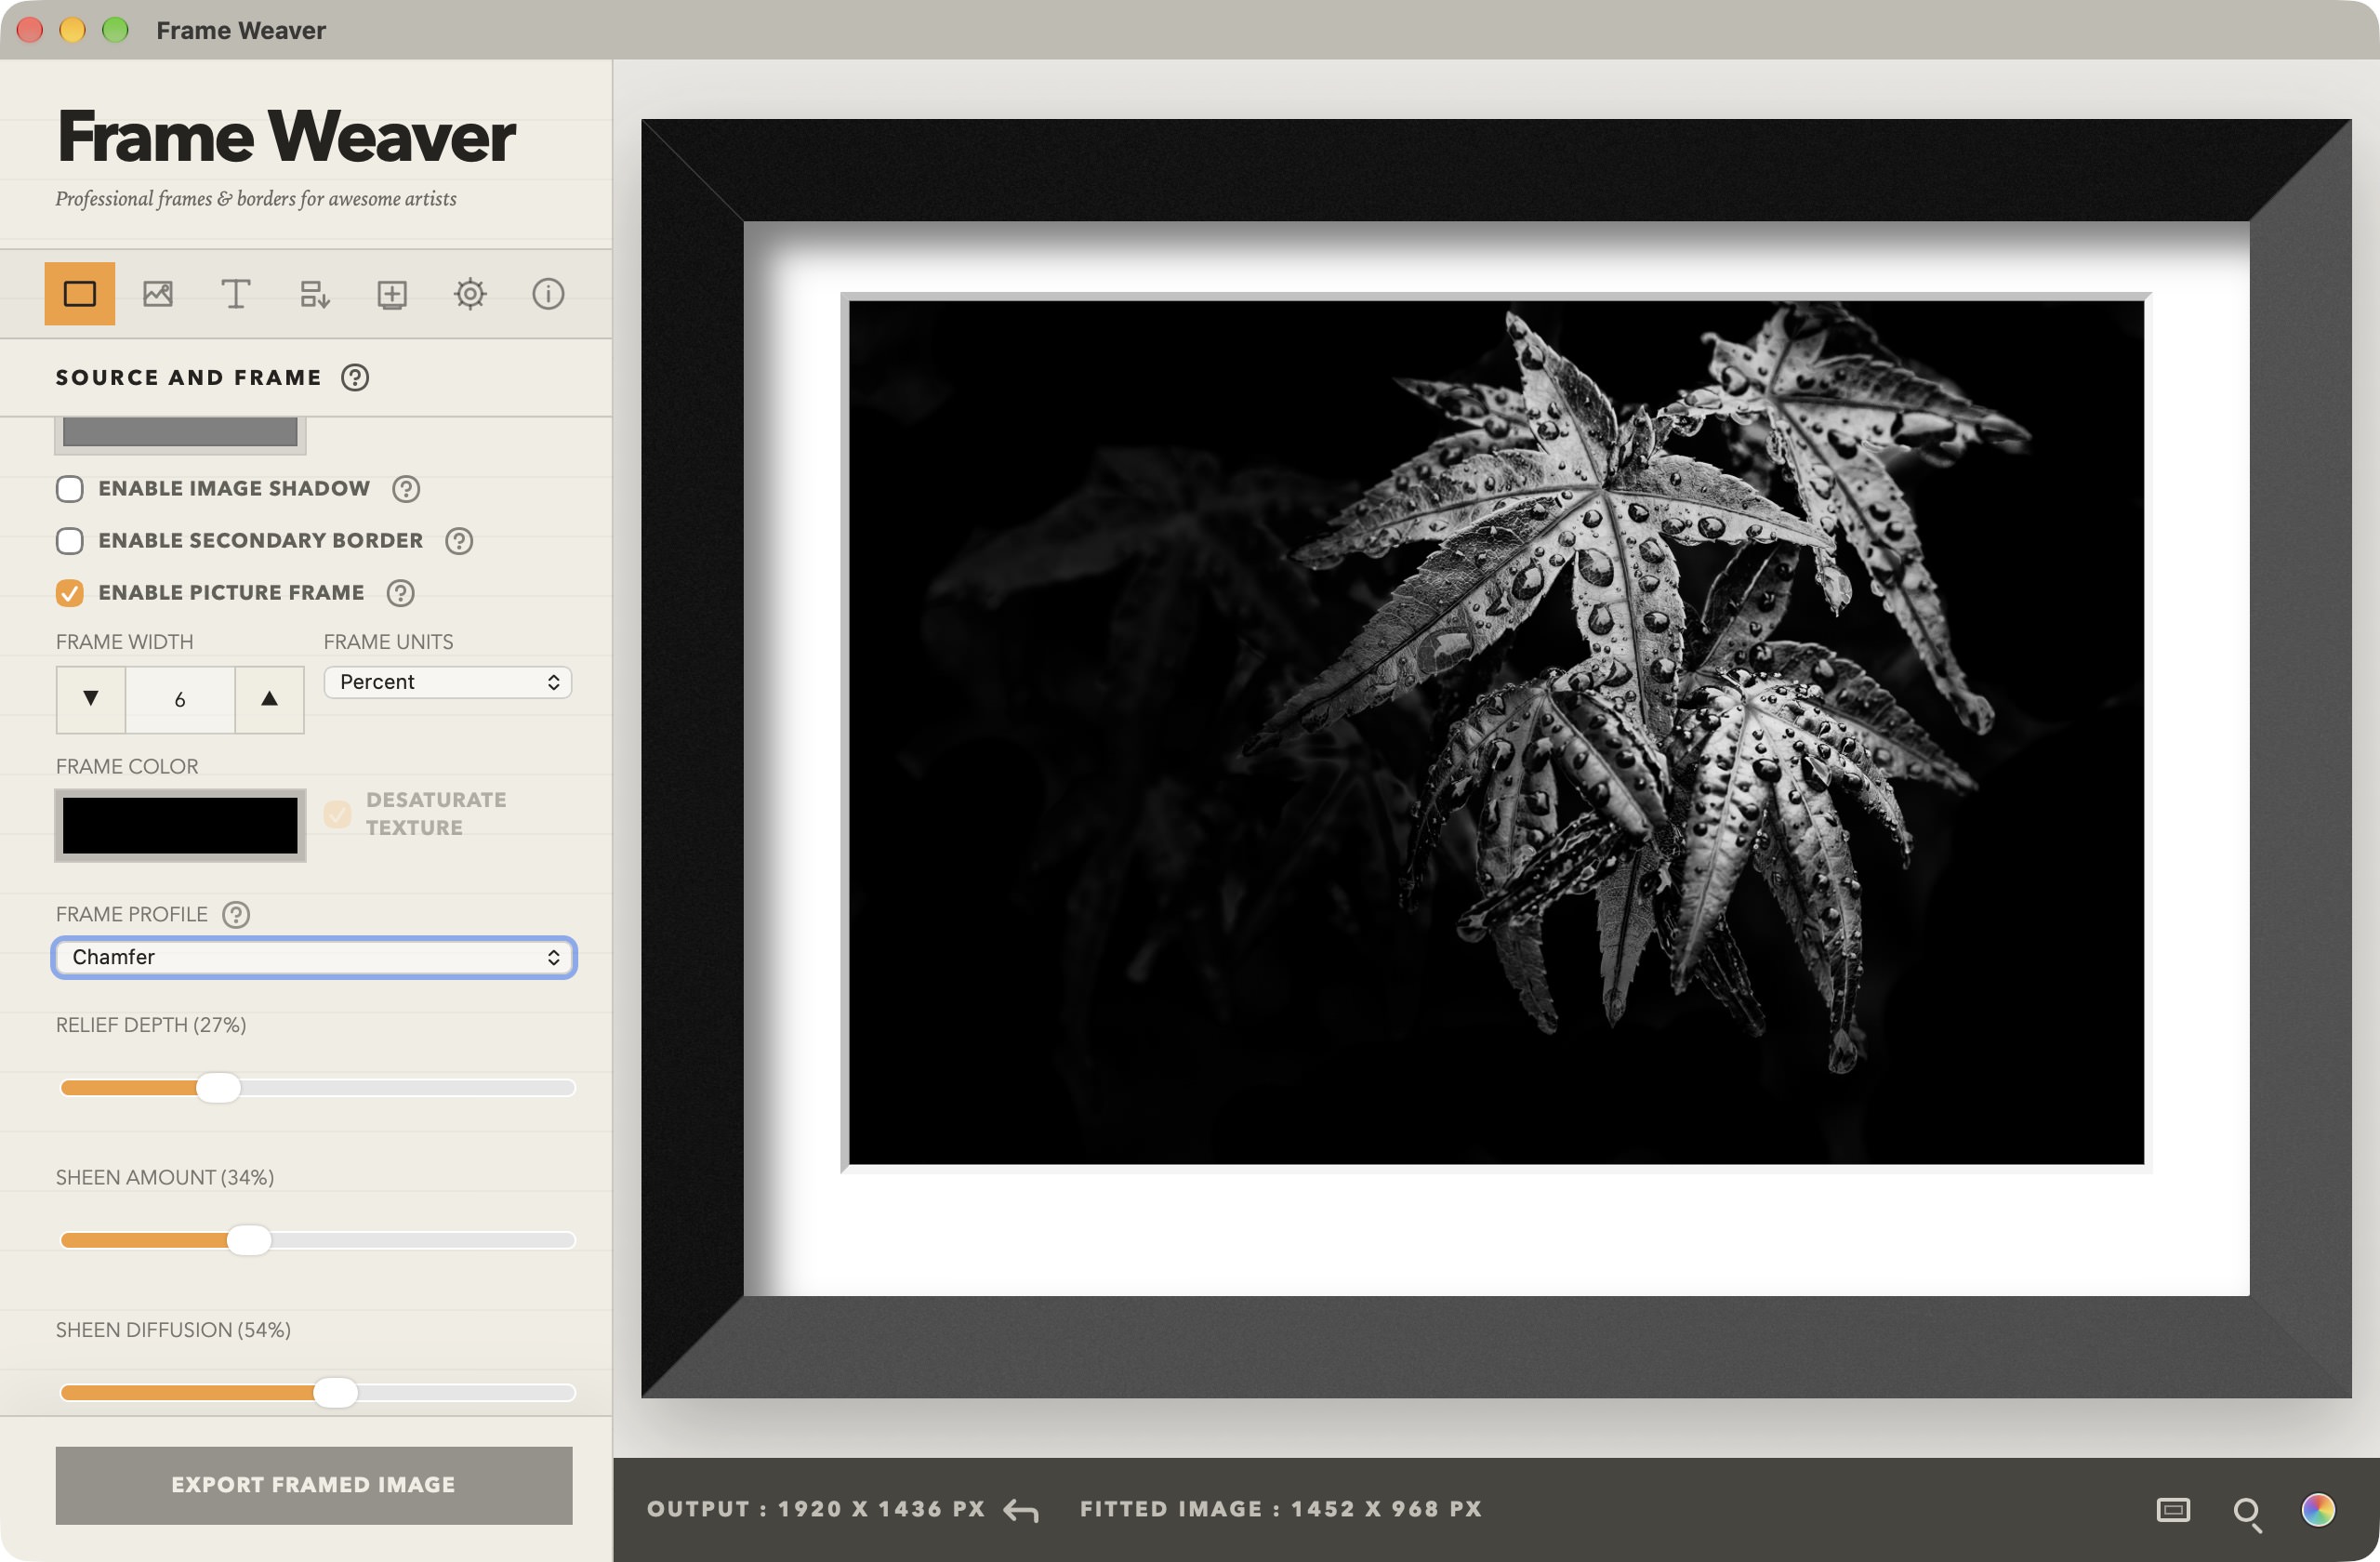
Here is a before/after screenshot of the built-in Chamfer Frame Profile, compaired to the default Flat frame. Slide the vertical bar back and forth to compare the images. How the light falls on the frame can be changed drastically, and fine tuned, with the Global Light angle, and now, from V1.2.0 the evelation of the light.
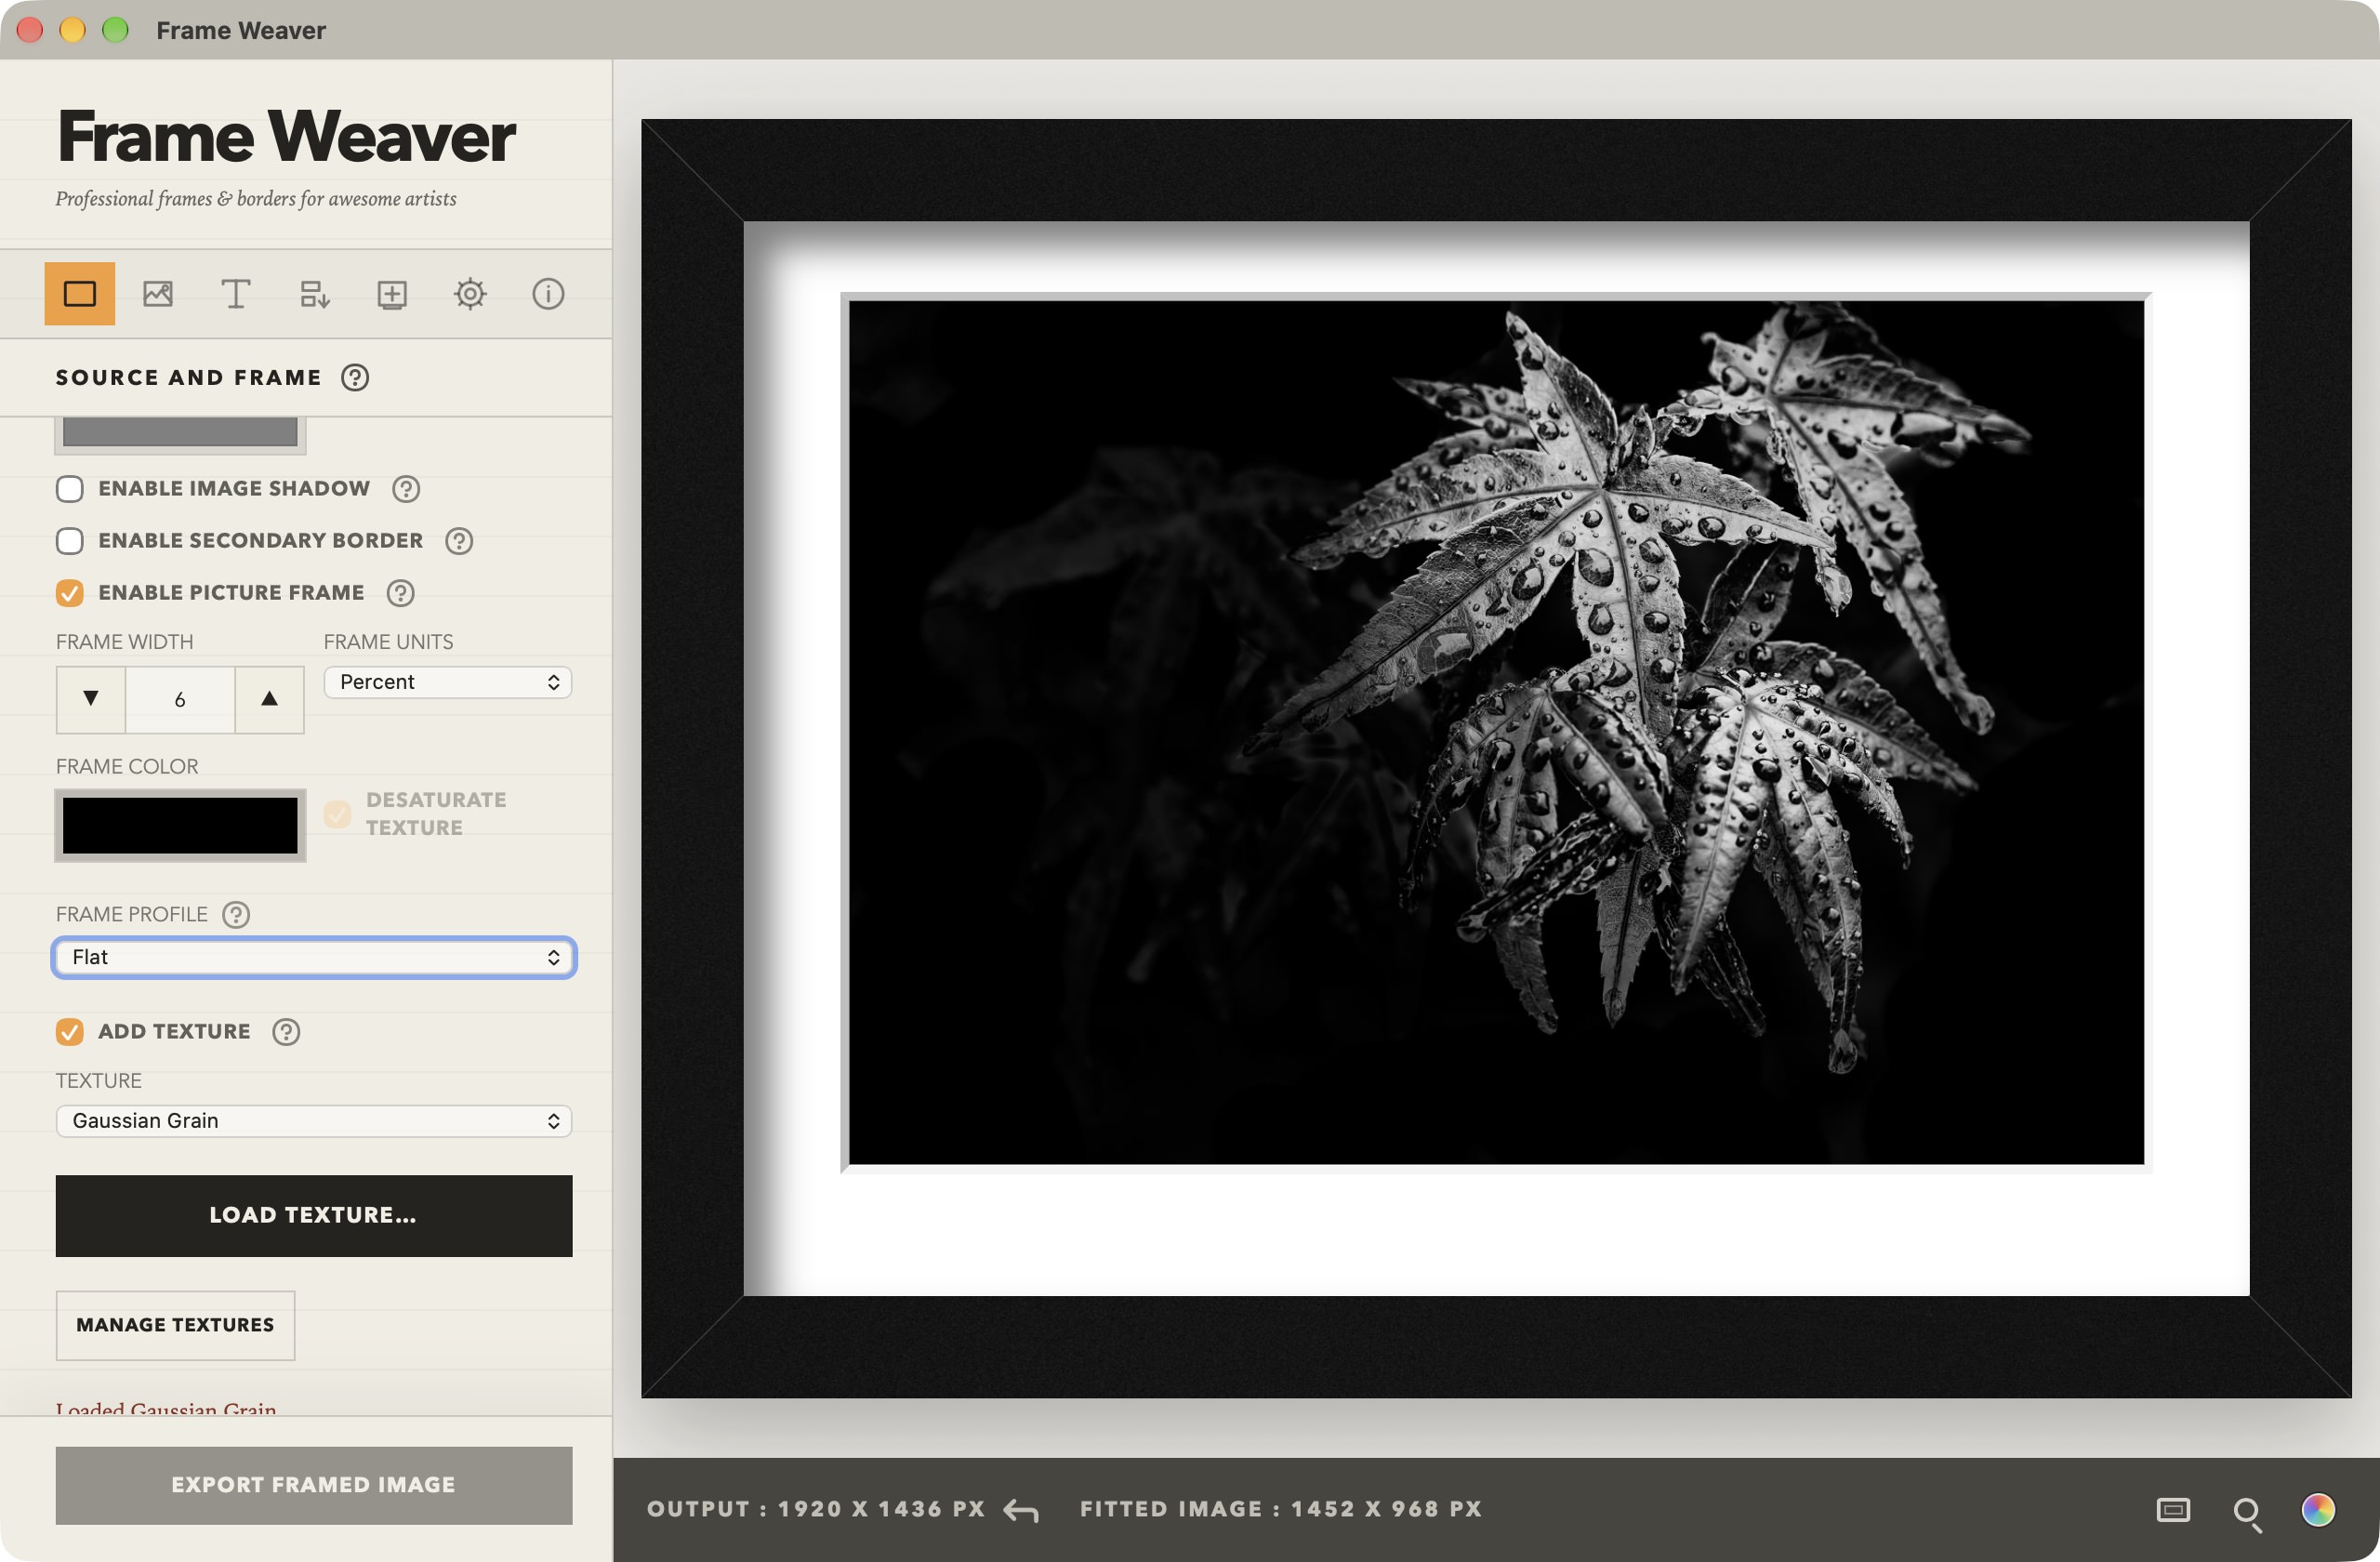
Here is a comparison of the default Flat frame profile compared the to built-in Bullnose profile, which is an equally rounded profile, providing a soft and nicely lit frame.
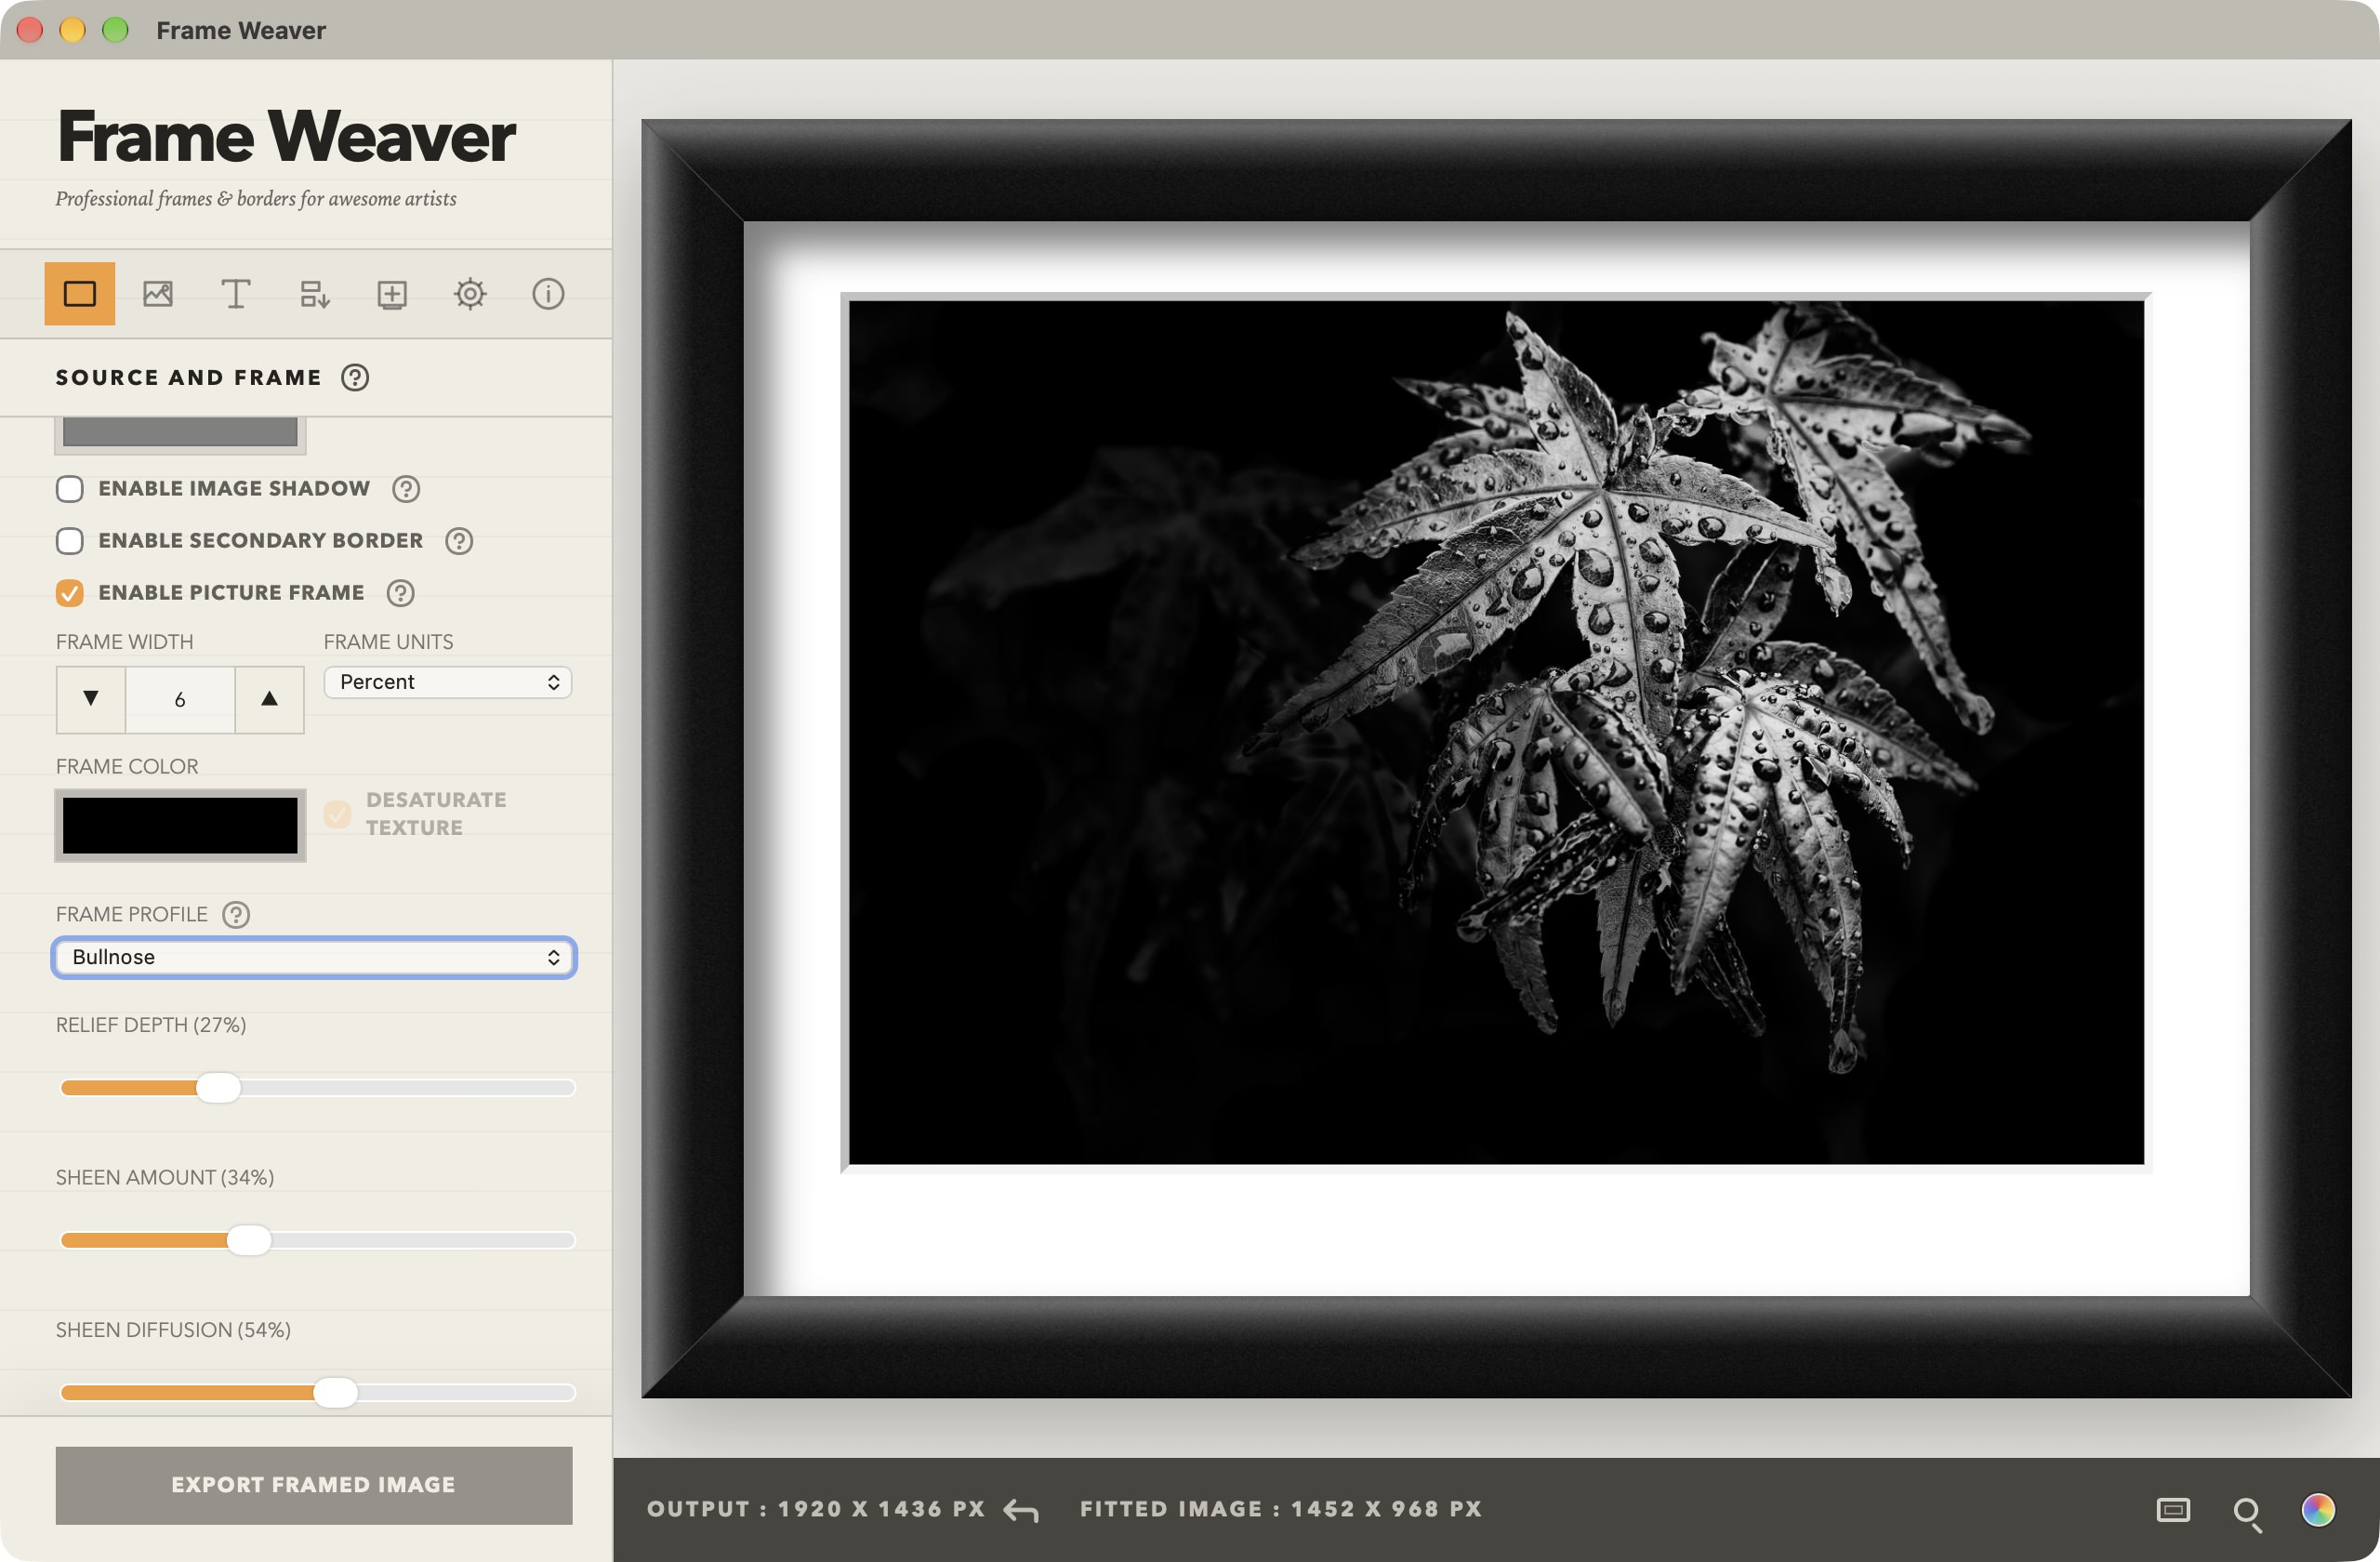
This comparison shows the Flat frame compared to a custom Frame Profile that you can see if you move the vertical comparison bar all the way to the left side of the image. Turning on the Smooth Point checkbox for the control points that shape the left curved side of the profile helps to make the shape I was looking for, and a small step on the right side adds a little more reality, as a frame would really never run down to a point on the inside edge.
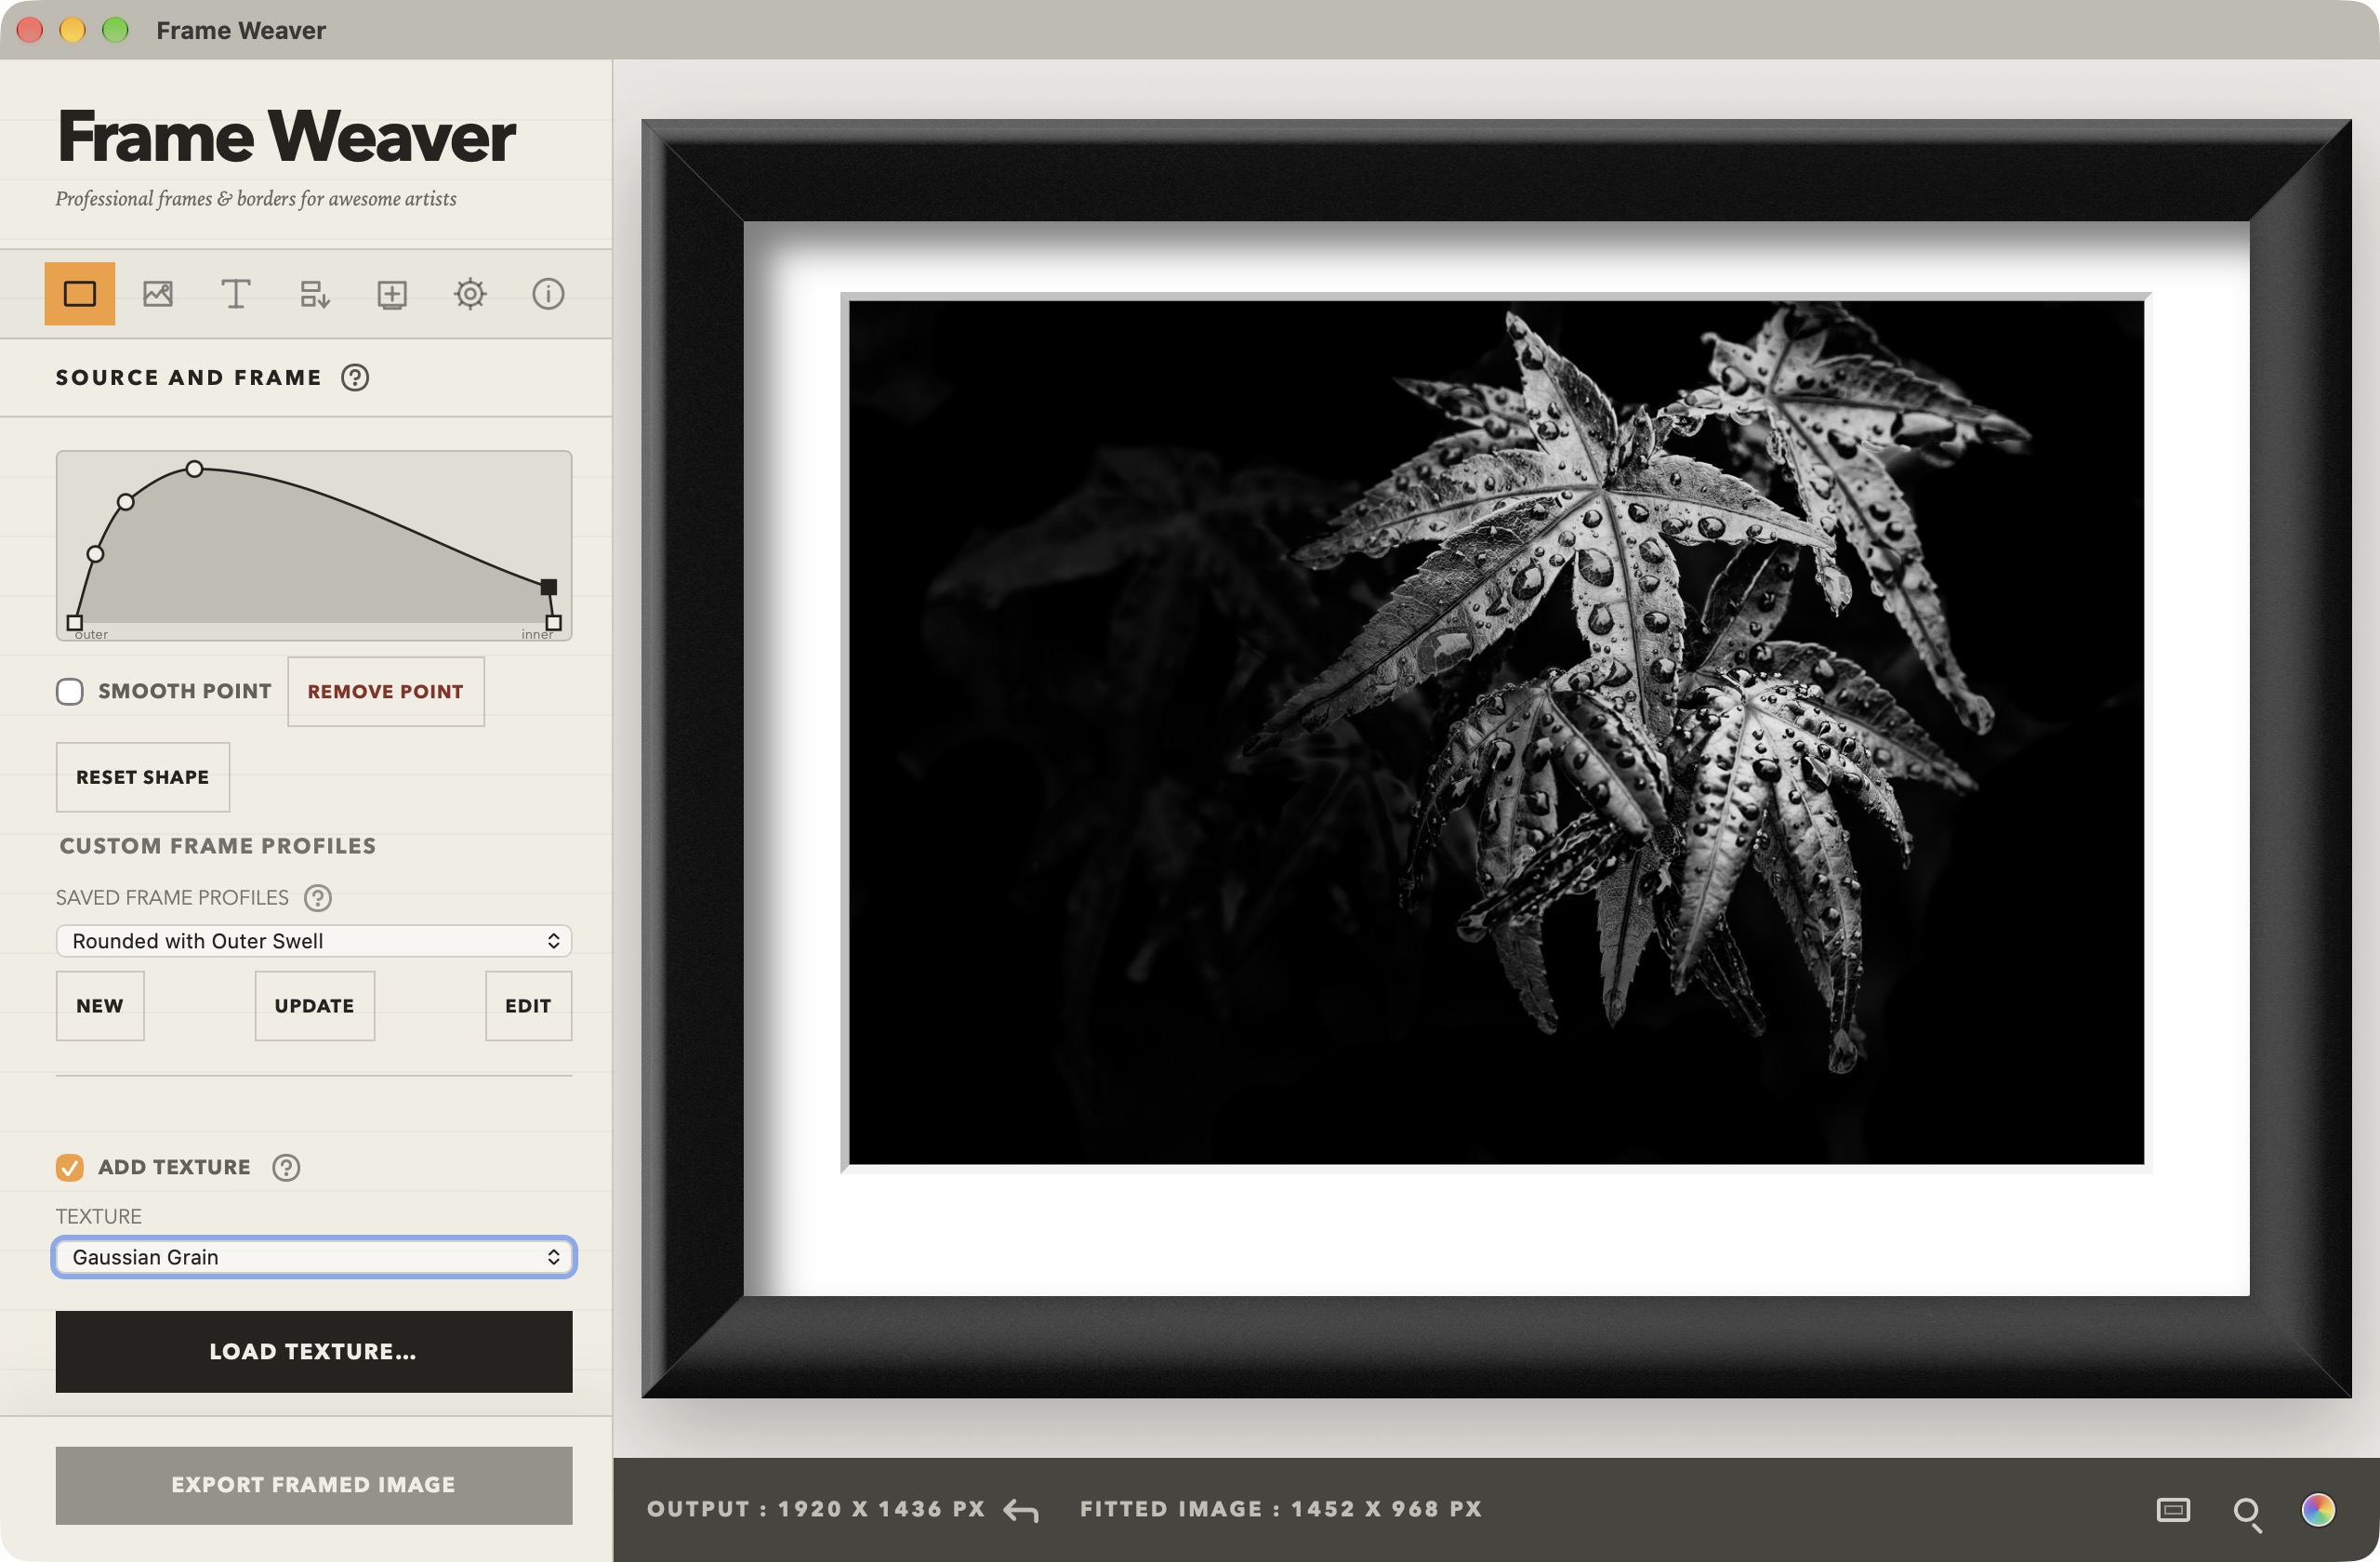
The final touches come from a combination of the Global Light settings that we looked at earlier, and the RELIEF DEPTH, SHEEN AMOUNT, and SHEEN DIFFUSION settings. The Relief Depth governs how high the profile effects the frame, and this can have strange effects if the global light and elevation are not adjusted to match the shape. The Sheen Amount is how much the light appears to catch the frame, and the Sheen Diffusion is as you would imagine, how diffused that Sheen light appears on the frame.
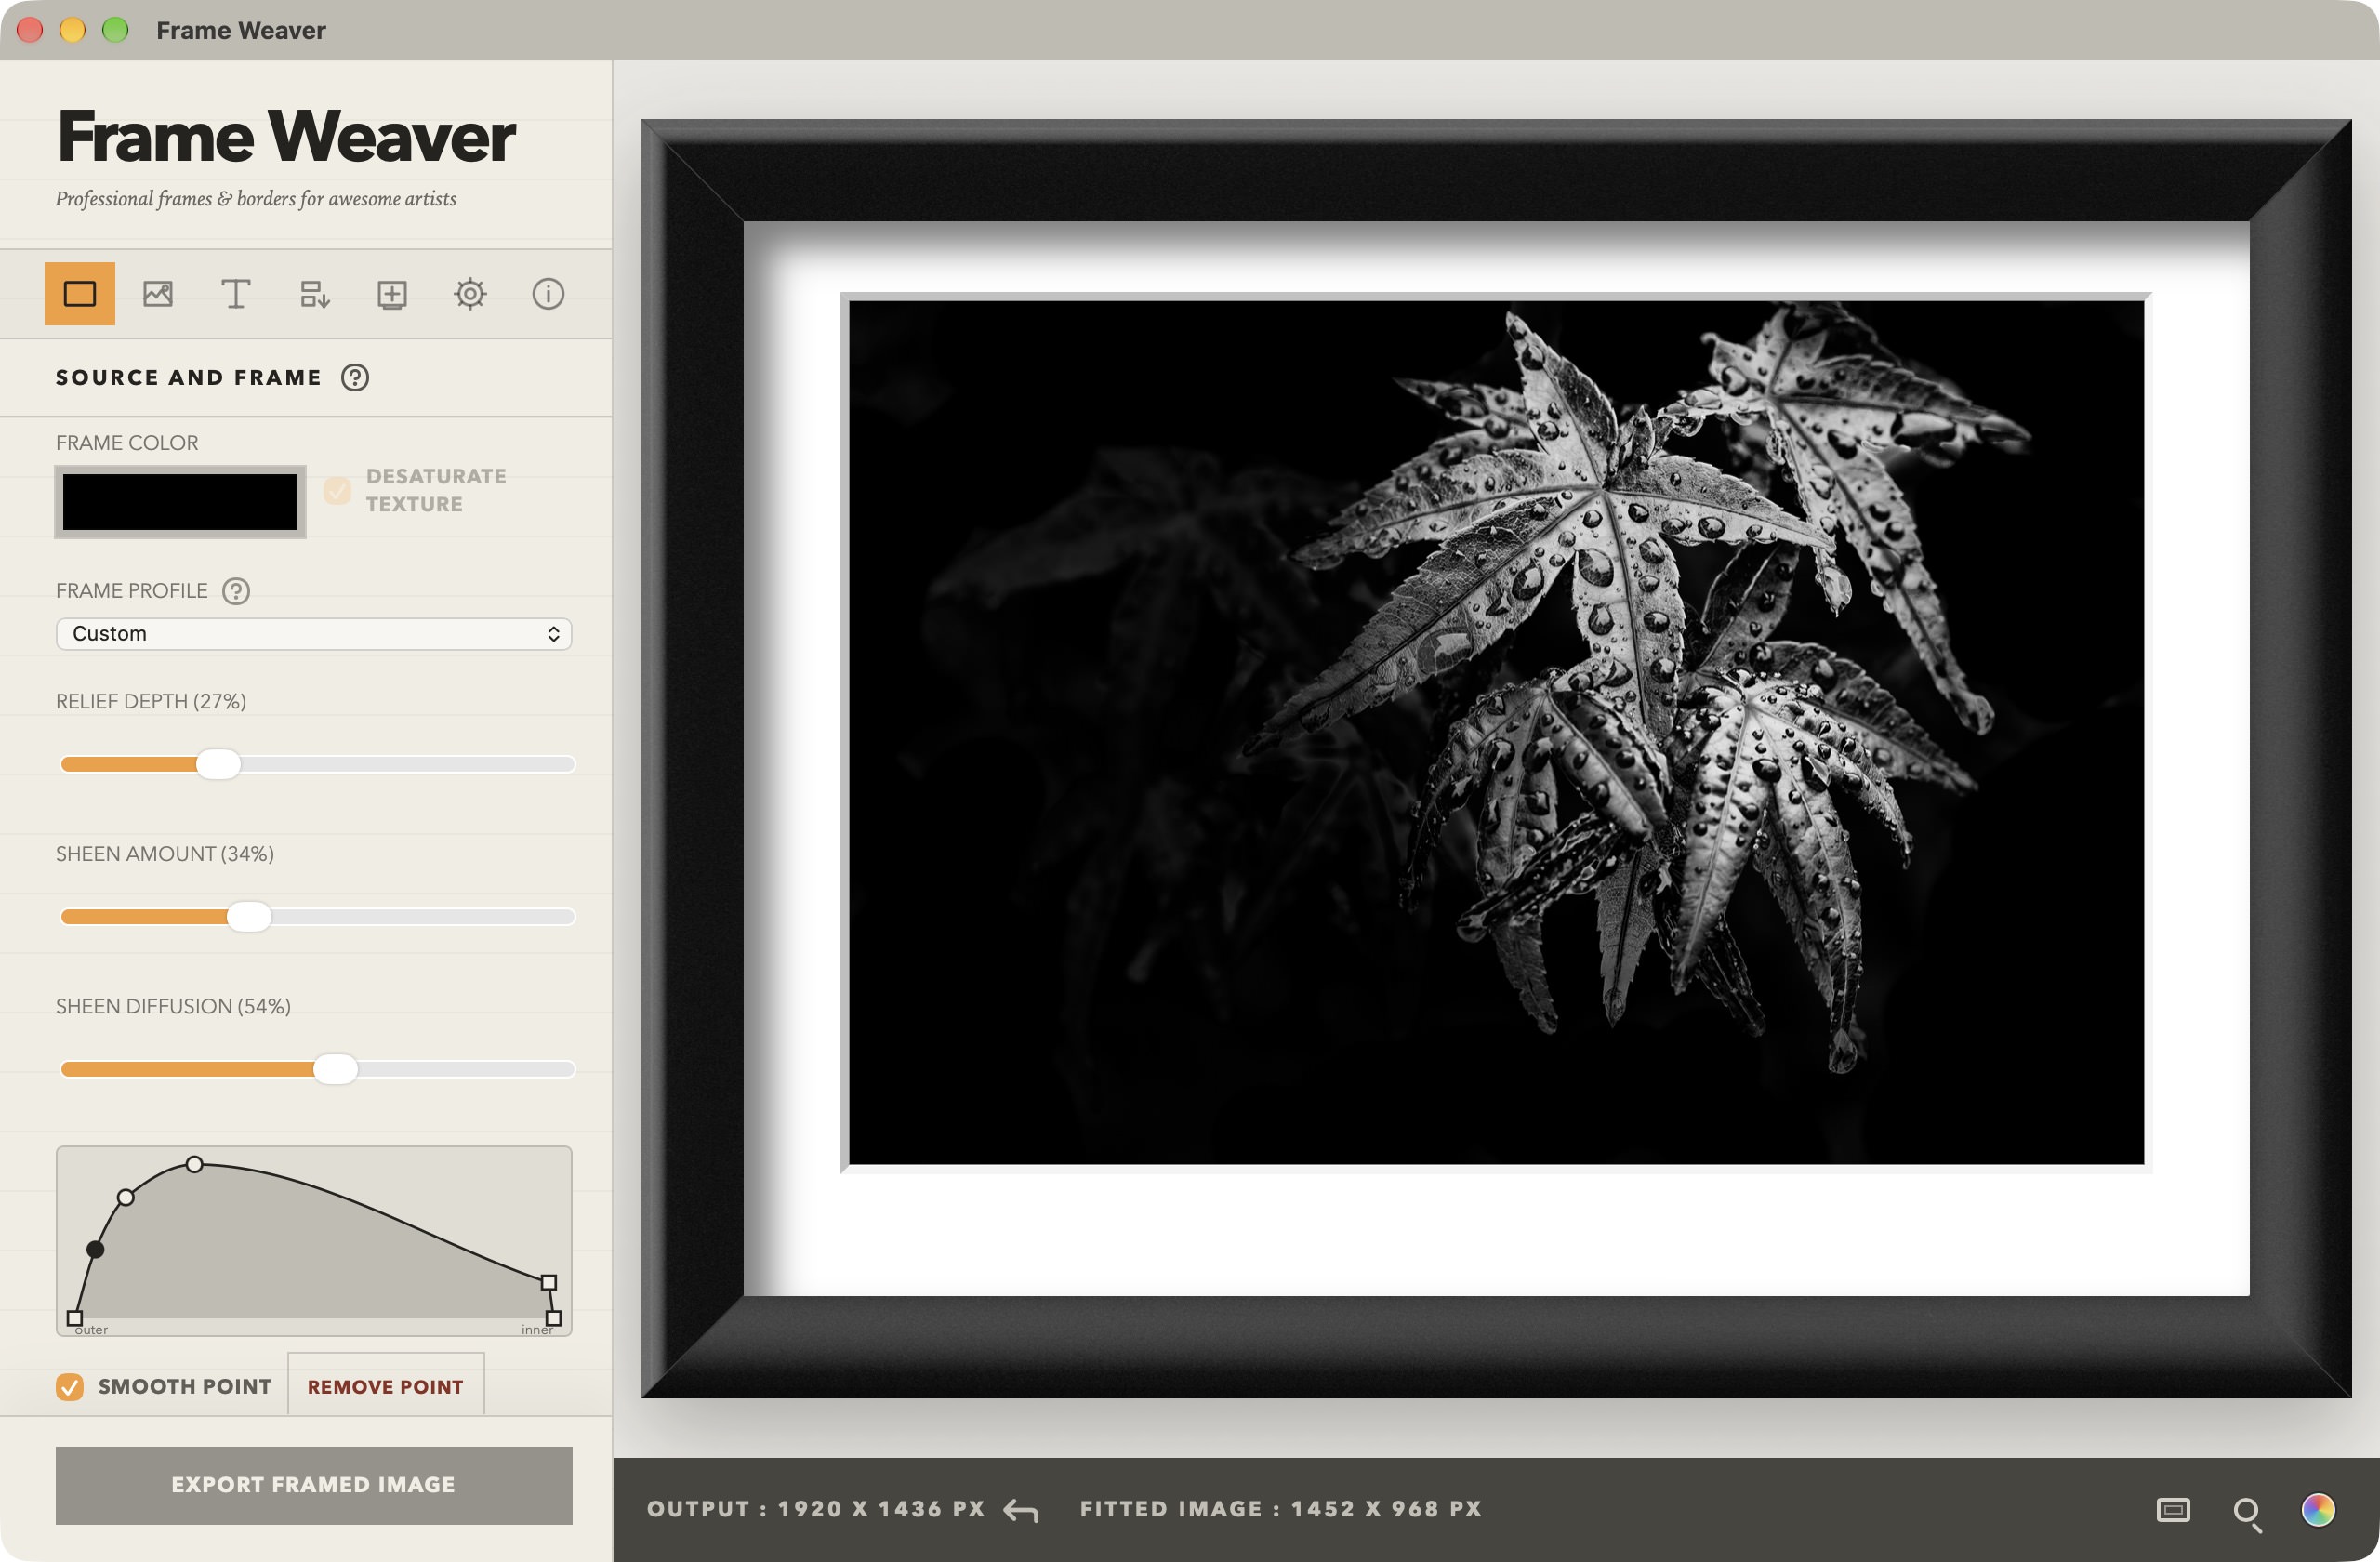
It can be a fine balance, but with these settings along with the Custom Frame Profile and Textures introduced in V1.2.0, we now have way more control over the frame than before.
Please don't forget to save your Frame Profile presets, so that they can be recalled and reused later, and these settings are also stored in the main Workflow Preset for the frame that you can save towards the top of the Source and Frame section.
Note too that there is a new default preset called Rounded Matte Black Custom Profile Frame, that you can find in the Screen > Colored Metal Frames folder if you install version 1.2.0 or later, and if you were already using Frame Weaver before V1.2.0 you can select RESTORE EXAMPLE PRESETS under the About section of the sidebar, and all of the Example Presets will be restored for you to reference and use.
There is a second new example preset called Ornate Gold Frame with Custom Frame Profile, which looks similar to the below screenshot, but after adding a texture, I changed the Relief Depth, Sheen Amount and Sheen Diffusion to get the exact look at you see here.
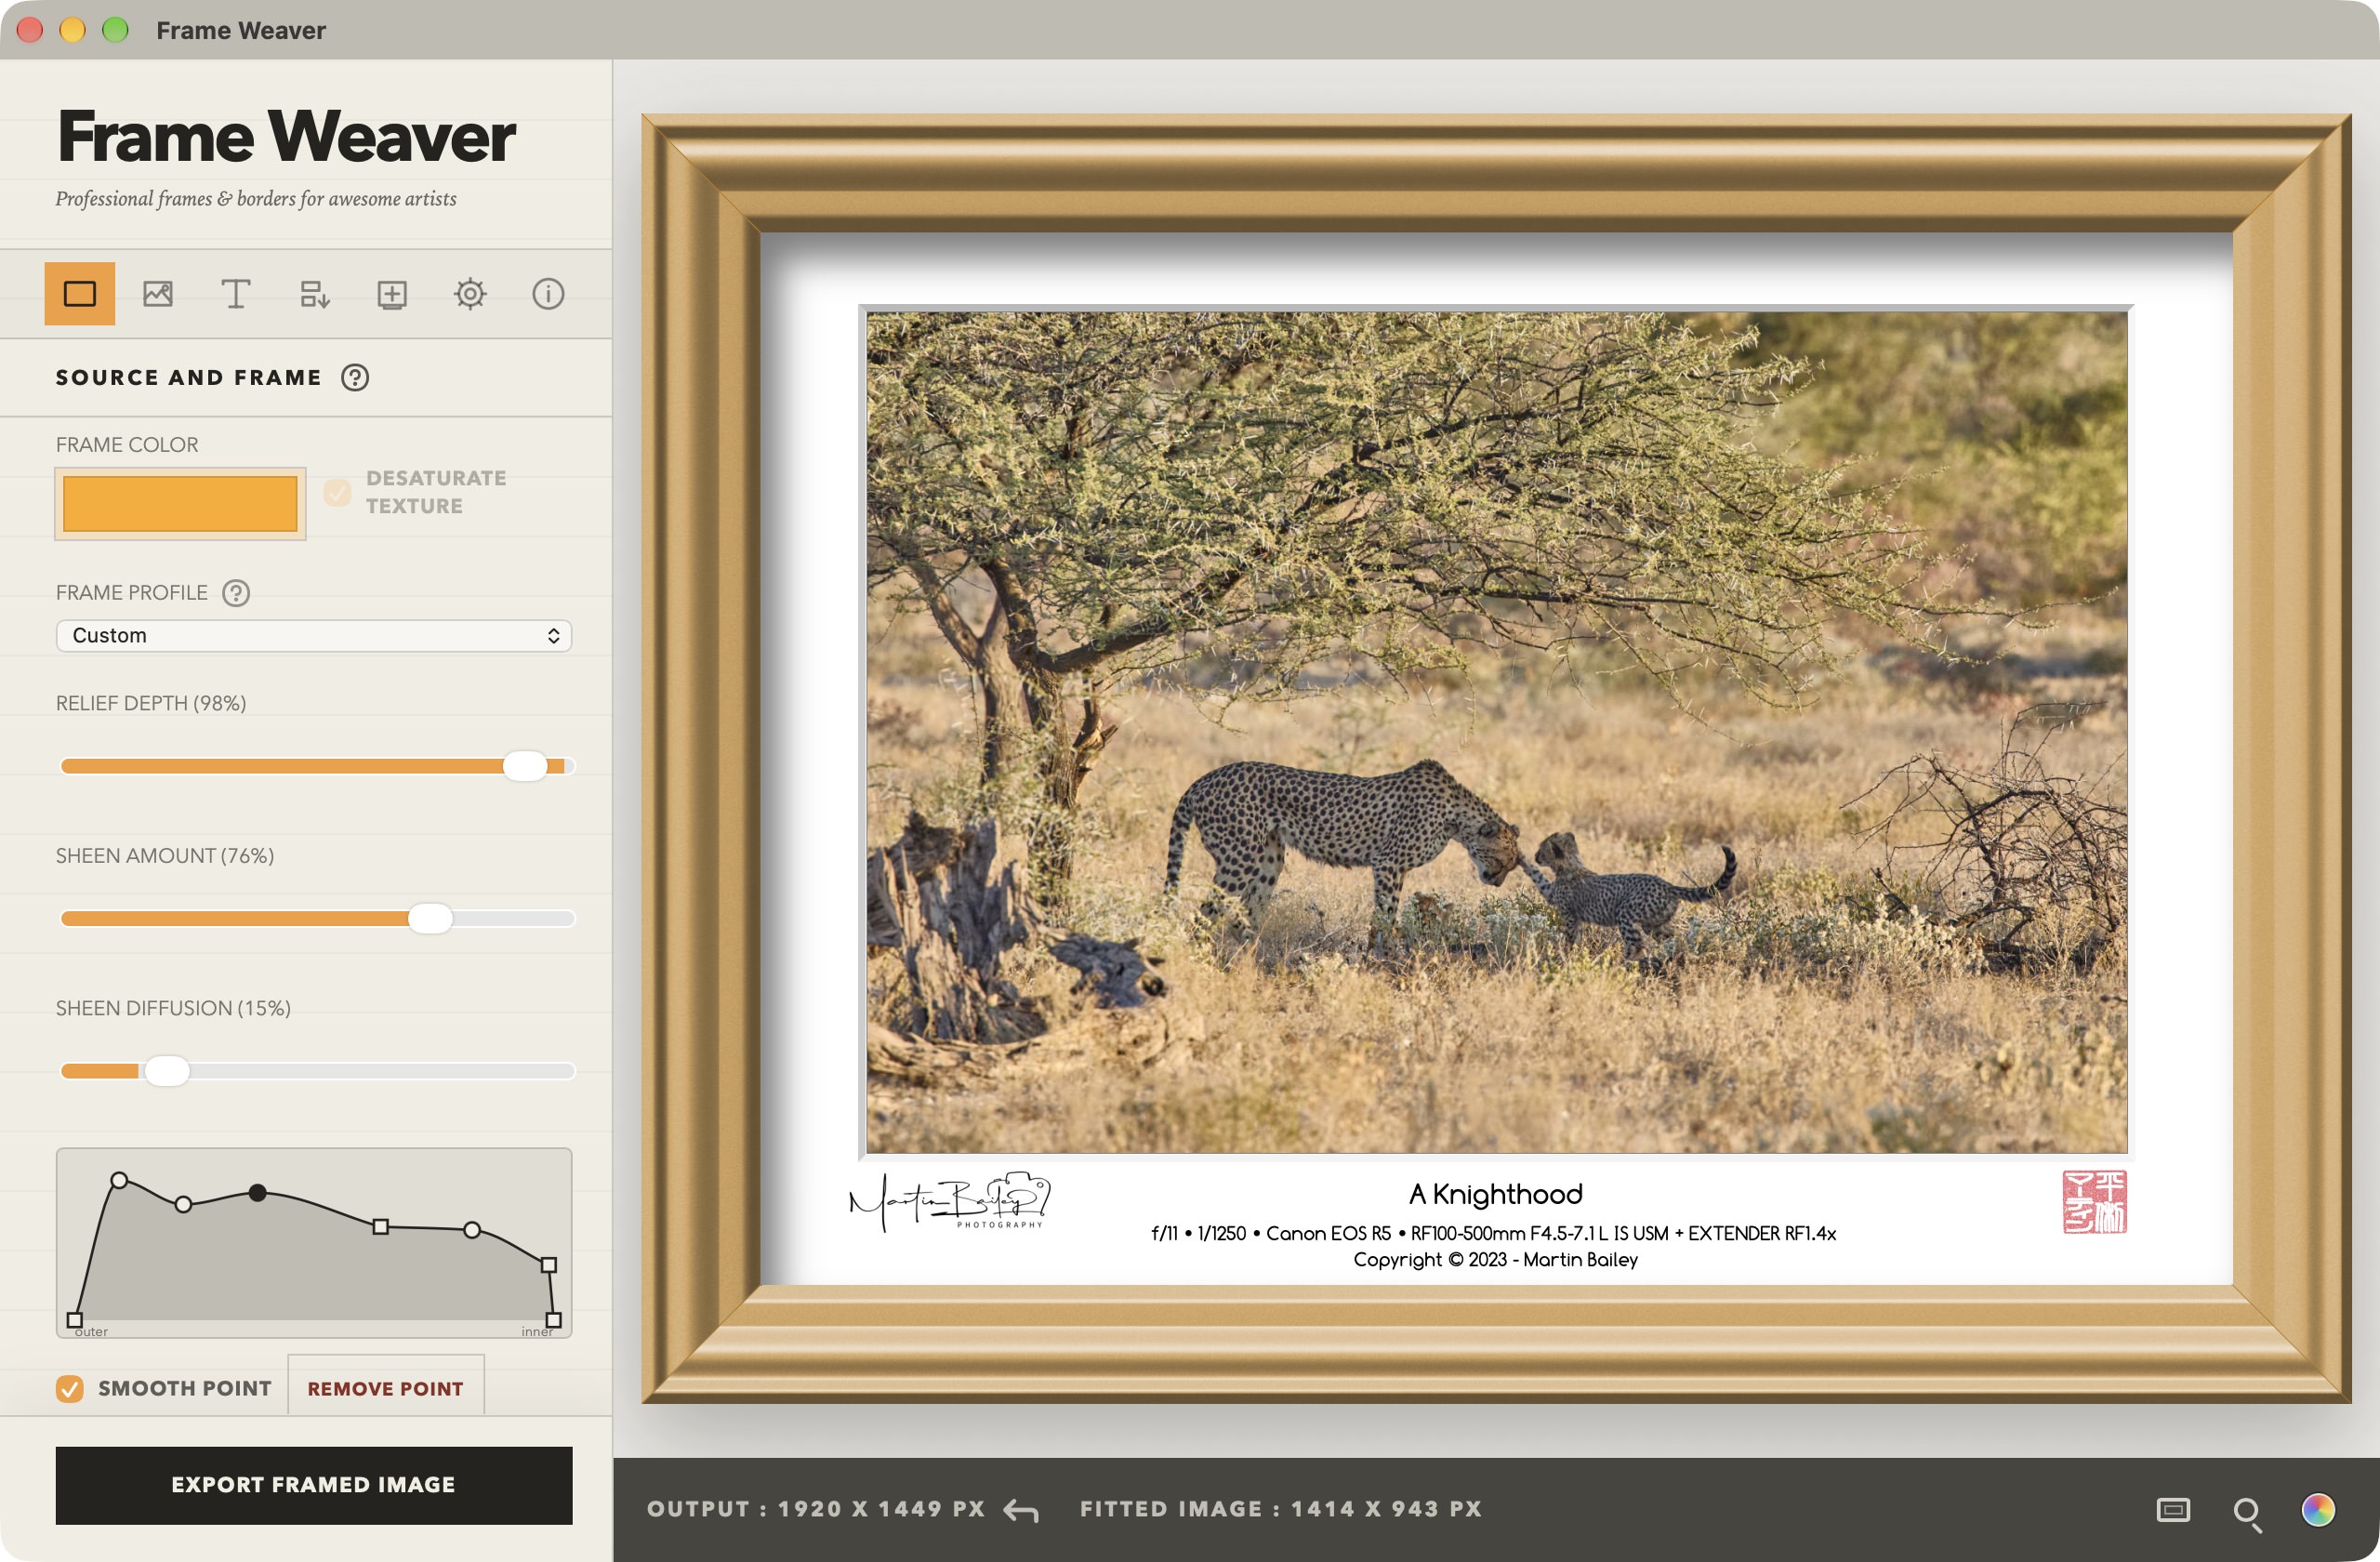
An important distinction we should make here though, is that the example files do not come with the custom texture files, so please follow this tutorial to make your own if you would like to use this effect. The dark frame used a background color of 252525, and the gold frame uses a background color of AAAAAA for the grain texture files.
New Guided Tours
We also added Help Tips to most of the feature headers in Frame Weaver in V1.2.0, and for new users, or anyone that wants a refresher, you can start these tours at any time with the Detailed Tour or Quick Tour buttons in the About section.
The Detailed Tour currently walks you through 44 features, with a little information on each, and the Quick Tour shows a cut down selection of 26 Help Tips. Many of the steps actually turn on the features that are being explained, so that you can see a frame being built and if you had a frame that you were working on before the tour started, don't worry. There is an option to restore your original frame at the end of the tour.
If you don't yet own Frame Weaver, you can get your copy from the Frame Weaver product page using the button below.