Here is the current MXD User Manual - DAW specific setup procedures follow the PDF
Click the third button from the bottom of the toolbar on the right to go full screen.
DAW Specific Setup Procedures
Common MXD Settings
During the following DAW setup instructions, you will be asked to set up MXD MIDI. You will find that procedure in the MIDI Setup section above.
Ableton Live
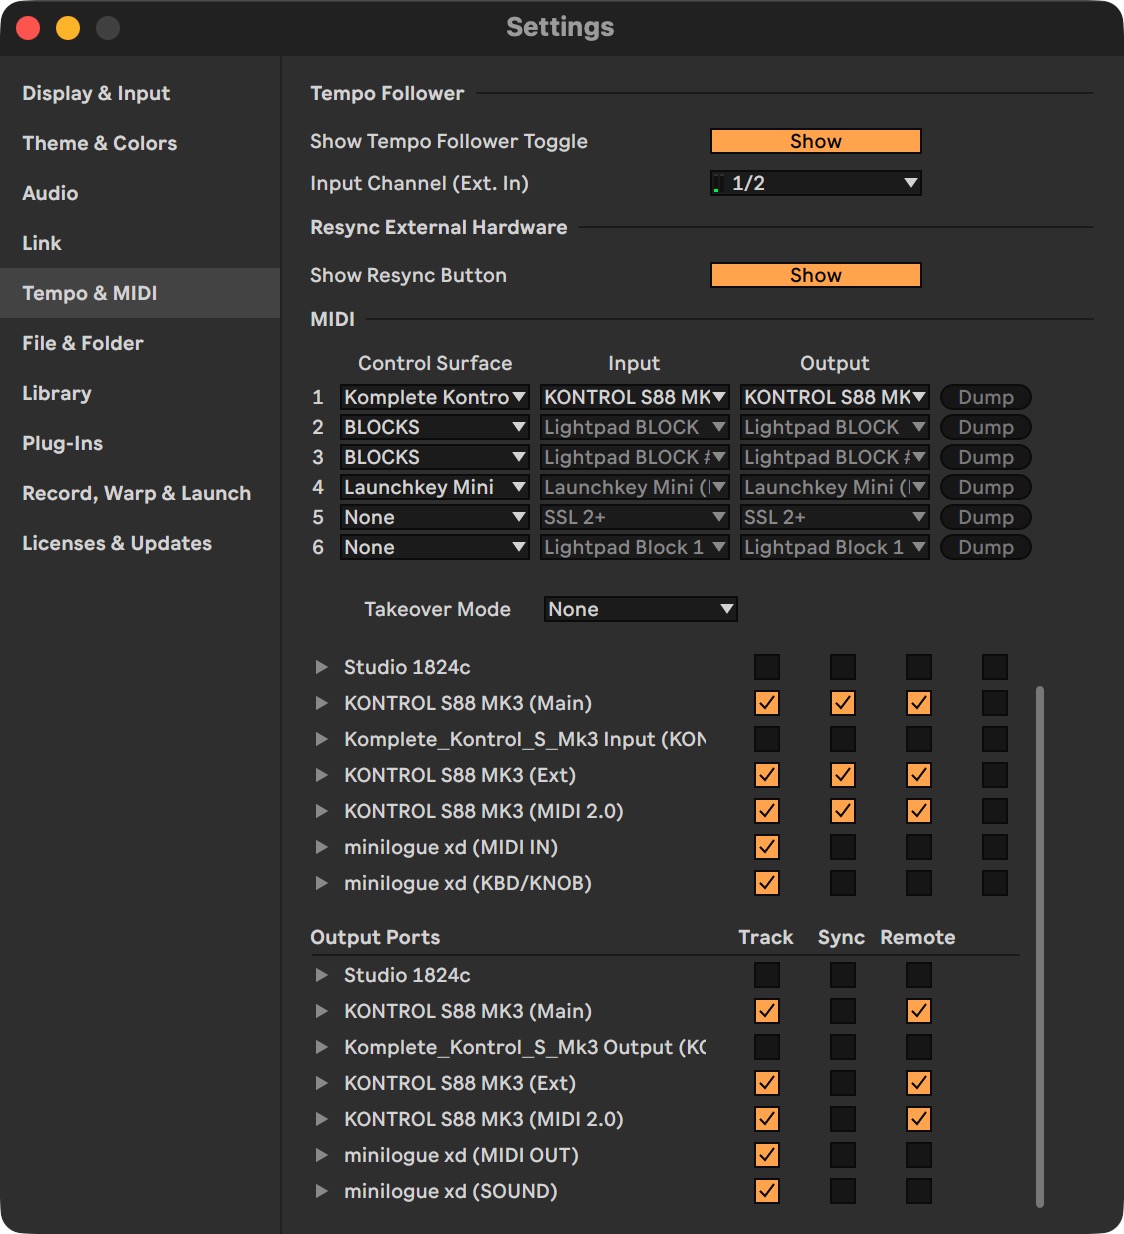
In Ableton Live, you have to add both Minilogue XD input ports and output ports to the Settings > Tempo & MIDI settings, with just the Track checkbox turned on for both. If you will use an external MIDI controller to play your Minilogue XD, add that too.
Then, follow the setup procedure in the MIDI Setup section above, and you should be ready to play, record, and playback from your Minilogue XD via MXD.
Reaper
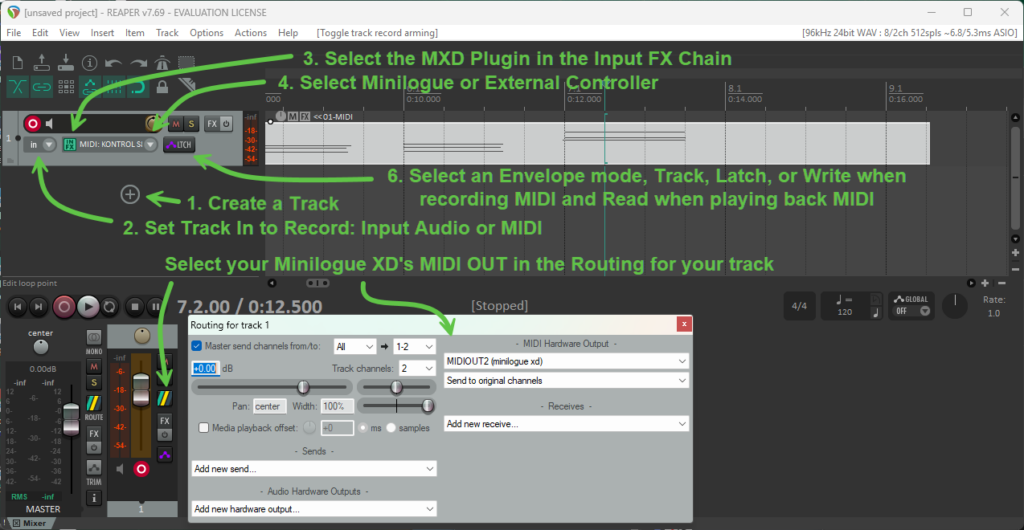
- Create a track for MXD
- Set Track In to Record: Input Audio or MIDI
- Select the MXD Plugin in the Input FX Chain
- Select Input MIDI > Select your Minilogue XD MIDI IN or your External MIDI Controller if used
- Select your Minilogue XD's MIDI OUT in the Routing for your track
- Select an Envelope mode, Track, Latch, or Write when recording MIDI and Read when playing back MIDI.
- In MXD, select your MIDI IN, MIDI OUT, and optionally an external MIDI Controller according to the MIDI Setup section.
Essentially, if recording from an external MIDI controller in REAPER, select that controller as the track’s MIDI input. MXD’s optional CONTROLLER field may still be used for MXD-specific controller handling, and must be used when using the Native Instruments KONTROL S-Series Mk3 templates. REAPER must also receive the controller as the track input if you want notes recorded into the MIDI item.
Known Issues
The following list contains issues we are aware of in MXD, whether they are shortcomings of MXD, the Minilogue XD, or the system.
- When using the plugin version of MXD in a DAW, we have no way that we are aware of to actually get a signal from the DAW when recording starts, therefore, to count the number of bars you are recording so that we can reset your Minilogue XD's program when looping, you must press the REC button in the PERFORMANCE section or press the OPEN button in the PERFORMANCE section to open the STATE CONTROL overlay, and press the REC button there, and then hit record in your DAW and we will try to count the bars. If we obtain an accurate bar count, you will be able to reset your sounds while looping, with no further action required. However, when you move to a different clip, you must manually set the clip length in bars. Using the STATE CONTROL overlay makes this easier and actually quite intuitive. Cause: No DAW we have tested so far announces the isRecording() flag to the plugin, so MXD needs to be primed before recording. Priority: Medium
- In polychain mode, if you notice that the volume of the slave Minilogue XD is much lower than the Master device, make a slight change to the MASTER (volume) dial in the top left corner of the Minilogue XD. This should cause it to sync to your Master device. Cause: We can adjust the MASTER gain on your Minilogue XD, but this is not always passed to the Slave device. Priority: Low
DAW Specific Issues
- The MASTER gain for adjusting the Minilogue XD's volume doesn't work well in REAPER.
Support
For support, licensing help, and product updates, visit our Support page.